
Complete Guide on How to Clean Bread Makers – Good Tips in 2023
One of the most difficult tasks in a kitchen can be cleaning up. Washing dishes, pans, and pots all require careful attention to detail. However, bread makers are a different story. After you’ve baked your last loaf of bread or batch of doughnuts, give your machine a quick rinse and then wipe it down with soap and water. This post will guide you Step by Step on How to Clean the Bread Maker.

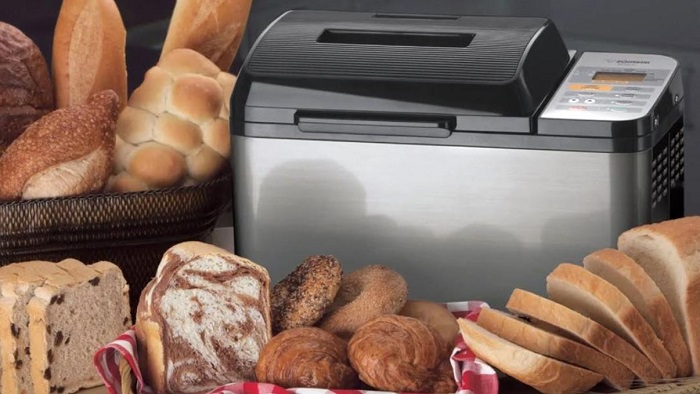
What is bread maker (Bread Machine)?
A bread maker is a kitchen appliance that can produce various kinds of homemade bread and dough. The bread and dough are made in the machine, which does not require any human intervention or labor. You just need to add all ingredients in it, push few buttons and you get fresh bread at your desire time. There are many different models and brands of bread makers available in the market. You just need to choose the one that has features you are looking for in your device.
Why do you need a bread maker?
1. Easy to operate and clean:
A bread maker is very easy to operate, it will have few buttons or knob which you need to push in right direction according to your desire results. After the operation of the device, you don’t need any kind of help as it has been designed in a way so that there is no difficulty in cleaning it; all parts can be easily removed from machine and washed under tap water.
2. Healthier food:
You can get fresh dough at home using your bread maker without any assistance from others as some people complain about their family members not allowing them use real yeast or other ingredients because they are afraid of its side effects when used by amateurs. With a bread maker you can make your own fresh dough and then bake it using an oven or a stove.
3. Faster and convenient:
It is much faster to use than traditional methods of baking bread at home because in most cases, homemade bread take more time to rise and in the meantime you have to prepare all other ingredients which may also take longer time. You can avoid this by using a bread maker; where everything will be done automatically for you without any need of human intervention during the process as mentioned above.
How to Clean Bread Makers?
A bread maker is an appliance that would be used regularly and hence you need to clean it on a regular basis so it will look as good as new for months.
How do I clean my bread maker?
1. Un-plug the electricity. Remove all crusts and residue from the bread maker.

2. Fill up a large bowl with water and add one or two drops of dish washing liquid to it.
3. Place the bread maker in the bowl, let it soak for about 3-5 minutes (depending upon your model). By this time you will find stains, oxides, etc will get loosen from its surface and can be easily removed using sponge. If required you can also scrub the machine with soft brush under running tap water; this will give better result.
4. Use wet towel to clean outside of Bread Makers.
5. It is very easy to make homemade bread/dough using a bread maker at home especially if you have no experience of making homemade bread or dough before using a bread maker.
What to look for before buying a bread maker?
1. Size of your family:
Make sure to buy the right size of a bread maker, if you have big family or you live alone then choose a large capacity device; however if you are going to use it very rarely then go for smaller ones.
2. Easy to operate and clean:
Look for devices that do not have many buttons and knobs as these will confuse normal people like us and also complicated cleaning process may need more effort in cleaning them after using them.
In case of any difficulty contact manufacturer’s customer service representative at the time of purchase, they would solve your problem with ease. These types of companies have trained technicians who can assist you in using and cleaning the product.
3. Features:
Look for some advanced features like preheat program, delay timer, simple to use recipe book etc. Many bread maker models have these features in them, which makes it very easy to make bread at home without any assistance of others.
4. Warranty:
Go for a device that has longer warranty period on its parts as you will get free replacement of parts if they break or damage within a specific time period. Lifetime warranty is best but not required as the basic functions are covered with 1 year of manufacturing defect warranty; however additional features come under this category so choose wisely.
How do I maintain my bread maker and some tips for using bread maker?
You just need to follow few instructions while using your bread maker to make sure that it will last for years to come.
1. Regular cleaning and maintenance:
As mentioned in point number 1 above you need to clean the bread maker every time after using it for making dough or baking bread, this will maintain its look and also prevent from rusting of moving parts etc.
2. Keep your appliance dry:
Do not use your machine if water is inside as this may cause electrical short circuit; remove any excess amount of water from bowl and dry them out well before starting fresh batch of ingredients.
Also while cleaning process check whether any water is still left inside the machine else wash them under tap water again or run a complete cycle with white rice (details below) so they get cleaned completely and they stay away from mildew smell etc.
3. Keep your bread maker away from water:
Do not use a wet cloth to clean it or you may get electrocuted and also its warranty will be void if there is any problem with electricity cause by moisture coming from outside (e.g. it was raining heavily outside). Also do not use cleaning agents containing acids as they may damage the body of the machine and therefore invalidate warranty too.
4. Use white rice instead of water in baking cycle:
Once every month you can run complete baking cycle on highest temperature with just white rice to get rid of odor, stains and dust particles that might have accumulated inside the machine over months without regular cleaning process due to which they might create some sort of mildew or stinky smell.
5. Delay timer and preheat function:
These two are very useful functions in bread maker as you can delay timer up to 12 hours; if you know that you will be late for work then put your ingredients into it and set a delay time so your bread will be ready by the time you reach home after office hours.
Preheat setting is also very useful during winter season, during such times there is low temperature outside so if you make pizza dough at night before sleeping and keep it inside this setting then when morning comes and temperature changed inside our home then these machines will start working automatically with maintained temperature of the dough inside it.
6. Use warm water:
Warm water produces good quality dough, which in turn gives good quality of bread after baking, so use warm water if it is available in your home.
7. Use table spoon of oil:
For making pizza, French loaf and chapathi you may add 1 or 2 tablespoons of vegetable oils into the bowl; this will prevent from sticking during kneading process and also give better taste to your baked product. Do not use extra amount of oil as it might spill out while mixing dough inside machine.
8. Do not over-fill the ingredients:
If there are too many ingredients in the lower tray then there might be difficulty for paddle to mix all those ingredients together properly due to which some ingredients might stick on pan bottom or walls of bowl etc., however always keep in mind that you should not fill the ingredients less than required as it might cause dough to spill.
Some bread maker has built-in recipe book in which there are instructions about how much quantity of ingredients are required for making each type of loaf, so if you can review these instructions carefully before using then this will save your time and energy in both cleaning up mess and also learning what went wrong (if any).
9. Never use salt in sweet dough:
Salt is a natural preservative however excessive amount of salt brings down yeast activity and therefore reduces rising power; therefore always add salt after completion of kneading process (when adding sugar or baking powder mix them with flour first before adding warm water then s et timer) so yeast can react well with other ingredients and then add salt (either with water in baking cycle or before completing dough).
10 . Use quality yeast:
Buy good quality yeast, never compromise in these; do not use expired yeast because they will not react well and give poor taste to your baked product. Always check expiry date on package before using it. Before using yeast always make sure that its smell is good; if it has any rotten odor then discard it as this may spoil your whole bread after baking.
When making sweet dough do not use 1 packet of yeast for 2 kg weight of flour as sometimes these packets contains only single serving size which will be less than required by the machine, instead buy two packets get ready to use at once for better results in baking.
11 . Never add ingredients after machine is switched on:
If you have added too much water then your bread will be sticky and doughy, if you are adding sugar but haven’t set timer in advance then these might turn into caramel etc. and create sticky mess inside the machine, and finally if you add yeast after beginning of kneading process then it will not react well with other ingredients which results in low rising power of your loaf so keep all these things in mind to make better use of this device by avoiding such mistakes or accidents.
12. Make sure that all blades are inserted properly:
Before using always check whether paddle, wire blade and all other attachments are properly inserted into their places otherwise your machine won’t work properly.
13. Always keep the paddle clean:
If dough has dried on paddle surface then you should remove it by using wet cloth otherwise your bread will not come out evenly and may taste bad. You may use any liquid detergent for cleaning but make sure there is no residue of cleaner left in vice or else this might spoil your food item before baking cycle begins.
14. Always put water in first:
Put sufficient amount of warm water inside the lower tray, which is required for kneading dough; do not fill water so much that it spills out while mixing bowl turns upside down as this might create sticky mess around machine.
15. Fill ingredients properly:
Do not over fill them or else these will spill out due to which there is a chance of making sticky mess around the machine and you will be wasting ingredients; instead add them properly as per recipe instructions, otherwise these might also spill out while mixing bowl turns upside down.
16. Always use a timer for kneading cycle:
After adding required amount of water inside food processor then set timer after start button is pressed. Normally this timing varies from 7 to 15 minutes again depending on recipe type and oven settings; however try to keep it within 10 minutes always because too much time will turn your dough into stone brick or else if you are using less time than it should then dough won’t get good rising power.
If baking with bread maker is new for you then read manual carefully before proceeding further otherwise take help of people who are well versed with this process as these might be the reason for making bad bread.
17. Never overfill baking pan:
Usually bread maker comes with a nonstick spring form pan which has a capacity to make 2 loaves at once; however never use more than 1/2 quantity of dough at one time because if its overflows then it might spoil your additional batch by entering heating element beneath this, and finally taste of baked product will turn bad. Although you can convert your standard baking tray into single loaf shaped but before doing so ensure that you don’t fill it up much while kneading process.
18. Clean all parts after using:
If you have noticed any sticky mess inside gear box during kneading cycle then the best way is to clean it immediately otherwise it will eventually become sticky enough to jam the whole machine. So after completion of baking process make sure that you are cleaning all parts properly, and finally wipe remaining dough with bread cloth so that things dry up completely before packing them for long term storage.
19. Always read manual carefully:
Before using your machine always ensure that you have gone through instruction manual because if you fail to understand any details related to baking like recipe volumes, weight etc. then these might be one of reasons for making bad bread by this device.
20. Never change settings while mixing:
If you want to knead the dough at slow speed instead of fast speed then don’t do it suddenly as this may create mess inside food processor; instead stop the device by turning off start button and remove blade. Then again put dough properly, set timer for desired time, restart the machine and make sure that you are using same mixing speed as well.
Conclusion
The bread maker is a great appliance to have. It can be used for more than just making delicious homemade loaves of bread! But, like any other cooking appliance you use on the regular, it needs some upkeep and cleaning. Luckily, there are easy steps that will help your machine last longer and keep things tasting fresh in-between uses.
If you want to learn how to clean your bread maker properly so as not to damage its functionality or shorten its lifespan, read these instructions carefully before beginning this process at home! You need to follow these steps according to our guide above. Please check carefully and contact us if you have any question.


